Using Blender every day, you get to change little things on it to speedup your workflow.
The problem is when you have to switch computers with somebody else's Blender, it sucks.
That's the main reason behind Amaranth. I ported all sort of little changes I find useful into this addon.
What is it about? Anything, whatever I think it can speedup workflow, I'll try to add it. Enjoy ❤
That's the main reason behind Amaranth. I ported all sort of little changes I find useful into this addon.
What is it about? Anything, whatever I think it can speedup workflow, I'll try to add it. Enjoy ❤
Not working? Download Amaranth 1.0.2 for Blender 2.77
I don't want to upgrade Pablo, you're a jerk! Yeah I am,
but besides that there was a refactor in Blender 2.74 that broke the addon.
For Blender 2.73 use Amaranth 1.0.0
How to Install
- Download the latest .zip
- In Blender, go to the User Preferences under File menu > User Preferences, or hit Ctrl + Alt+ U
- Switch to the Addons tab. Click on the "Install from File" button on the header, look for the .zip file.
- Installed! You should see it on the list, but grayed out. Now you need to enable it by clicking on the box at the right. Then save your settings. Optional: Most options are enabled by default, you can disable some on the Addon preferences.
Features (there are more actually, I'm still documenting them)
-
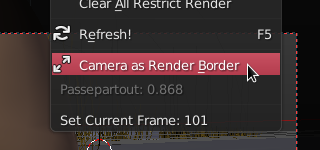
Set Camera Bounds as Render Border
When in camera view, we can now set the border-render to be the same size of the camera, so we don't render outside the view. Makes faster render preview. Under Specials menu W, when in Camera view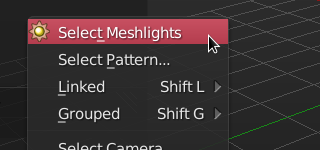
Select Meshlights
Select all the meshes that emit light. On the header of the 3D View, top of the select menu
Passepartout on Specials menu
The passepartout value of local cameras is now available on the Specials menu for easy access. Under Specials menu W, when in Camera view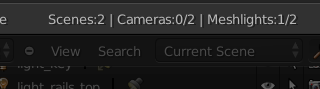
Scene, Cameras, and Meshlights Count
Complement the stats header by displaying the number of scenes, cameras, and light emitting meshes.
Disabled by default as there has been reports of very minor slowdown on scenes with many hi-poly objects. Never experienced myself but just in case. First enable it on the Addons preferences, then it will appear on the Info header.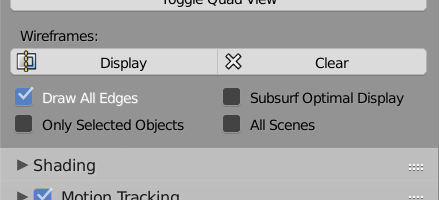
Wireframe Toggle
Enable or disable wireframe display on mesh objects. It even works on linked objects/scenes too, where this option is not accessible.
"Display" will enable the wireframe, while "Clear" will disable it. Both using the following settings:- Draw All Edges: Display edges even on coplanar faces
- Subsurf Optimal Display: Enable/Disable the "Optimal Display" option on Subsurf modifiers
- Only Selected Objects: Only apply to the selected objects, otherwise apply to all.
- All Scenes: Display wireframe on all the objects in all scenes. Handy when working with linked scenes, where it's impossible to access the Wire option from the UI.
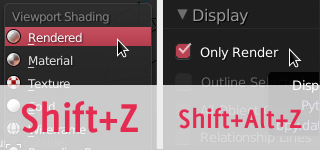
Shading Shortcuts
Two new shortcuts have been added to the 3D View.
Shift+Z Rendered Preview (now in Blender 2.70)
Alt+Shift+Z Only Render
3D View
-
-
UI: Final Resolution
Always wondered how big the render was going to be when rendering at a certain %?
This feature displays a "Final Resolution" label with the size in pixels of your render, it also displays the size for border renders.
On the 'Dimensions' panel, Render properties. 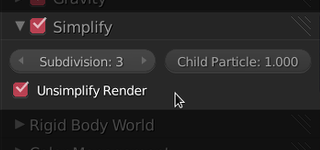
Unsimplify Render
Handy option when you want to simplify the 3D View but unsimplify during render. Find it on the Simplify panel under Scene properties.
Remember Layers for Render
If you're doing lighting/rendering tasks, you'll probably have a bunch of layers that you want/need to be enabled for final renders.
When tweaking lighting, or if somebody else has to open the file to check something, you/they are likely to tweak the layers visibility and forget which ones were needed for the render to look good.
In the Render Layers properties, you'll now find a "Save Current Layers for Render" button, this will save the currently visible scene layers as those that should be enabled for render. You can adjust this further by clicking on the slots on the right.
Now all you need to do before saving your file for rendering is press the "View Layers for Render". Find it on the Render Layers properties.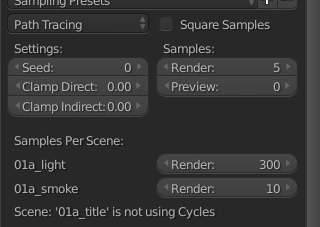
Cycles: Samples per Scene
When working in production, it's often more convenient to do lighting and compositing in different scenes (so you can later append the comp scene to bring together nodes, settings, lamps, RenderLayers).
This would lead to work with more than one scene. When doing render tests you want to know at a glance how many samples the other scenes have, without manually switching. This is the idea behind the feature.
Find it on the Sampling panel, on Render properties. Developed during Caminandes Open Movie Project
Cycles: Set as Render Samples
So you've been tweaking the samples per shader amount very carefully, finally found a sweet number that works. Now you want to do a quick test, so you have to remember each amount to put it back later on...
Worry no more! With the Set as Render Samples button, you can store these amounts and go to 75%, 50%, 25%, or back to 100% safely.
This gets saved on the .blend file, so you can set it now and forget about it. Find it on the Sampling panel, Render properties.
Object ID for Dupli Groups
Say you have a linked character or asset, you can now set an Object ID for the entire instance (the objects in the group), and use it with the Object Index pass later in compositing. Something that I always wanted and it wasn't possible!
In order for the Object ID to be loaded afterwards on computers without Amaranth installed, it will automatically create a text file (called AmaranthStartup.py) and save it inside the .blend, this will autorun on startup and set the OB IDs. Remember to have auto-run python scripts on your startup preferences.
Set a Pass Index and press "Apply Object ID to Duplis" on the Relations panel, Object Properties.
Render
-
-
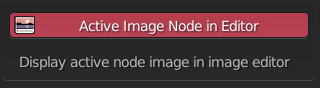
Display Active Image Node on Image Editor
A quick way to view an image assigned to an Image node
Double click to show on the Image editor (if there is any available). If you don't like this behavior, you can disable it from the Addons properties.
Coded by the awesome Sergey Sharybin. Double-click an Image Node in the Nodes Editor (Compositor or Cycles), there must be at least 1 image editor available. This feature only works on Blender 2.68 and newer.-
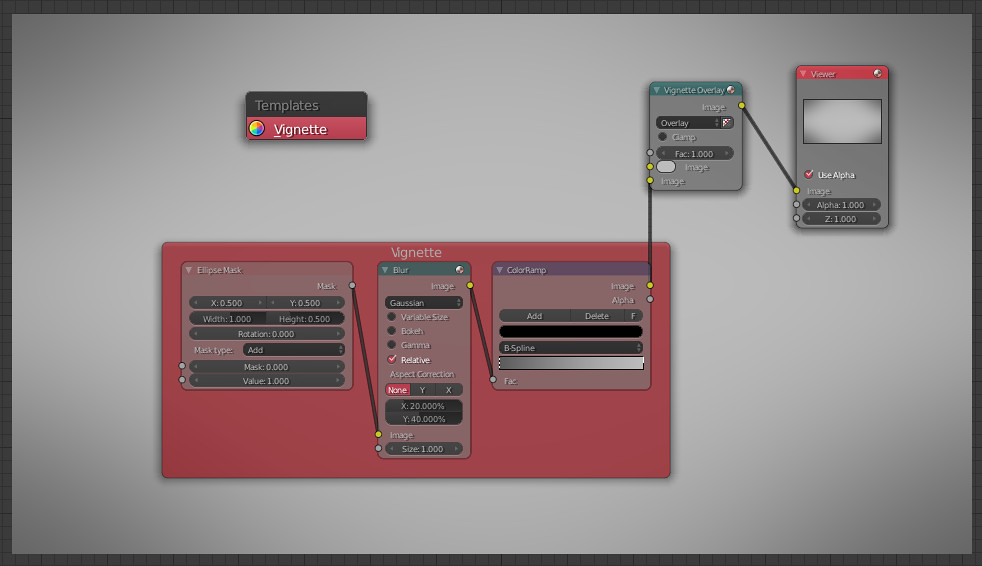
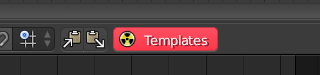
Node Templates - Vignette
Add a set of nodes with one click, in this version I added a "Vignette" as first example.
There is no official way to make a vignette, this is just my approach at it. Templates: On the Compositor's header, "Template" pulldown. Or hit W.
Vignette: Adjust the size and position of the vignette with the Ellipse Mask's X/Y and width, height values. 
Nodes: XYZ Sliders for Normal Node
Tweak the Normal node more accurately by using these sliders. Not the most intuitive way to tweak, but it helps.Coded by Lukas Töenne. Thanks!ProTip:
Hit Shift+Drag for moving in very small steps.
Find it on the Properties panel, when selecting a Normal node.-
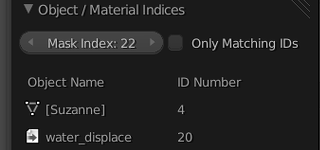
Object / Material Indices Panel
When working with ID Masks in the Nodes Editor, is hard to follow track of which objects/materials have which ID.
This adds a panel on the sidebar when an ID Mask node is selected.
The active object is highlighted between [square brackets] On the Nodes Editor's sidebar, when an ID Mask node is selected 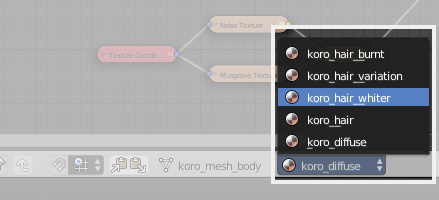
Material Selector
Quickly switch the active material by selecting from a menu in the header.
This is different from the current Material ID picker because it doesn't change the material assigned to the current slot, it switches which one is active. Nodes Editor's header
Shaders Extra Info
Display the name and type of the current object, also works for lamps. Nodes Editor's header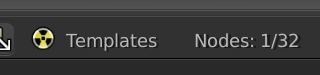
Nodes Stats
Display the number of selected and total nodes on the compositor. On the Compositing Nodes Editor.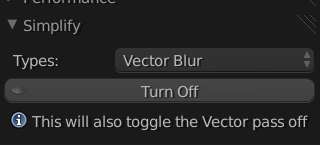
Nodes Simplify Panel [WIP Feature]
Disable/Enable certain nodes at a time. Useful to quickly "simplify" compositing.
This feature is a work in progress, the main issue now is when switching many different kinds one after the other. On the Nodes Editor Properties N panel.
Nodes Editor
-
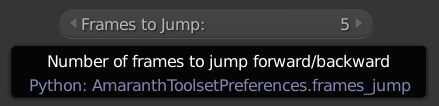
Jump X Frames on Shift Up/Down
When you hit Shift Up/Down, you'll jump 10 frames forward/backwards. Sometimes is nice to tweak that value.
In the User Preferences, Editing tab, you'll find a "Frames to Jump" slider where you can adjust how many frames you'd like to move forwards/backwards.
Make sure you save your user settings if you want to use this value from now on. Find it on the User Preferences, Editing.-
Shortcut: Ctrl+Tab to switch between Dopesheet/Graph Editor
Hit Ctrl + Tab to switch between Dopesheet and the Graph Editor.
Developed during Caminandes Open Movie Project 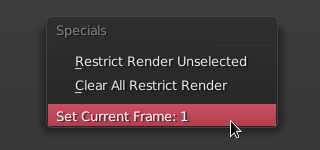
Current Frame Slider
Currently the only way to change the current frame is to have a Timeline editor open, but sometimes you don't have one, or you're fullscreen.
This option adds the Current Frame slider to the Specials menu. Find it on the W (Specials) menu in Object mode or Pose mode, click-drag sideways or click in the middle to set the frame manually.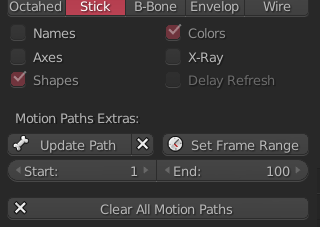
Bone Motion Paths:
Match Frame Range + Clear All Paths- Clear All Paths: Silly operator to loop through all bones and clear their paths, useful when having hidden bones (otherwise you have to go through each one of them and clear manually)
- Match Current Frame Range: Set the current frame range as motion path range.
Thanks to Bassam Kurdali for helping finding out the weirdness behind Motion Paths bpy Developed during Caminandes Open Movie Project
Animation
-
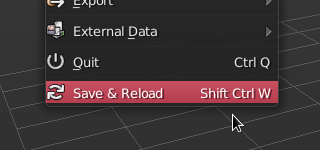
Save & Reload File
When working with linked libraries, very often you need to save and load again to see the changes.
This does it in one go, without asking, so be careful :) Usage: Hit Ctrl + Shift + W or find it at the bottom of the File menu
Refresh Scene
Refresh the current scene, useful when working with libraries or drivers.
Could also add an option to refresh the VSE maybe? Usage: Hit F5 or find it on the Specials menu W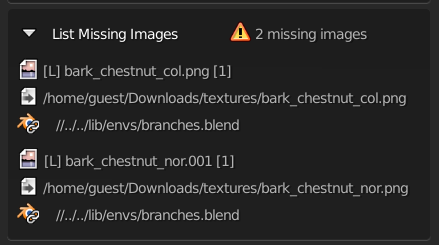
List Missing Images
Display a list of missing images (that is, images that can't be found) Under a collapsable list because it can get long (if you're on a messy production :)
Display the image name and its path, if the image is coming from a linked .blend, display the path to it.Find it on the Scene Debug panel, on Scene properties.ProTip:
Clicking on the .blend library path (Blender icon) will open the file in a new Blender instance.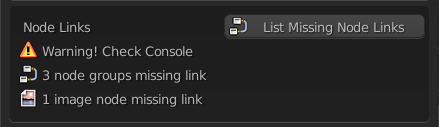
List Missing Node Links
Have you ever had a "Missing Datablock" message on a node group? Or an image node that is empty, leading to pink everywhere in your scene (not that is a bad thing). That's probably because that node group or image was linked, and the link got lost (file moved, changed name or shenanigans).
The "List Missing Node Links" button will print:
- 01. Node Groups that were linked but are now "Missing Datablock"
- 02. Image Nodes pointing to a non-existent image
- 03. Image Nodes that don't have any output connected
Also, it will print on the terminal a list of all the materials that meet any of the missing cases above, the object they belong to, and their path (if they're coming from a library).
Find it on the Scene Debug panel, on Scene properties.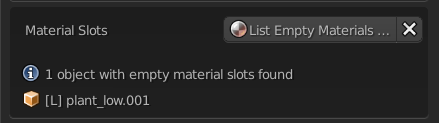
List Empty Material Slots
Having empty material slots with no material assigned to it, is very rare, but can happen. Sometimes because the material was linked and the link got lost.
The "List Empty Material Slots" button will print a list of all the objects that have empty material slots. If the objects are linked, it will show a list of the libraries paths, click on them to open a new Blender instance with that library.
Find it on the Scene Debug panel, on Scene properties.-
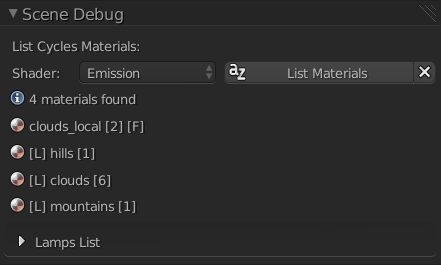
List Cycles Material using X shader
Where X is any shader type you want. It will display (and print on console) a list of all the materials containing the shader you specified above.
Good for finding out if there's any Meshlight (Emission) material hidden, or if there are many glossy shaders making things noisy.
-
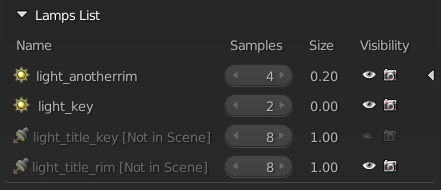
Lamps List
This is a collapsable list of Lamps in the scene(s).
It allows you to quickly see how many lamps you have, select them by clicking on their name, see their type (icon), samples number (if using Branched Path Tracing), size, and change their visibility.
The active lamp is indicated by a triangle on the right. Under the "Scene Debug" panel in Scene properties.
Scene
Scene: Debug
This is something I've been wanting to have for a while, a way to know certain info about your scene. A way to "debug" it, especially when working in production with other teams, this came in very handy.
-

File Browser > Go to Current Blend's Folder
For when you're lost browsing files and want to go back to the currently open blend's directory. Look for it on the File Browser's header, only shows up if the file is saved.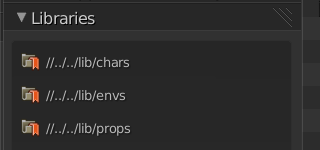
File Browser: Libraries Bookmark
The "Libraries" panel on the File Browser displays the path to all the libraries linked to that .blend. So you can quickly go to the folders related to the file.
Click on any path to go to that directory. Developed during Caminandes Open Movie Project
File Browser
-
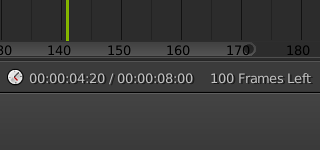
Timeline Extra Info
Display amount of frames left until Frame End, very handy especially when rendering an animation or OpenGL preview.
Display current/end time on SMPTE. Find it on the Timeline header
Timeline
-
-
Symmetry Tools: Find Asymmetric + Make Symmetric
 Our character wasn’t completely symmetric in some parts where it was supposed to,
this could be by moving vertices by mistake or just reasons.
To fix this in a fast way, Sergey coded this two super useful tools:
Our character wasn’t completely symmetric in some parts where it was supposed to,
this could be by moving vertices by mistake or just reasons.
To fix this in a fast way, Sergey coded this two super useful tools:
- Find Asymmetric: Selects vertices that don’t have the same position on the opposite side
- Make Symmetric: Move selected vertices to match the position of those on the other side
Mesh Editing
-
-
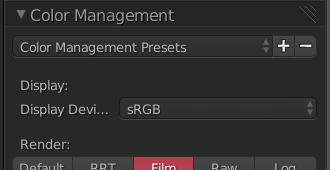
Color Management Presets
Save your Color Management options as presets, for easy re-use.
It will pretty much every option in the Color Management panel, such as the look, color settings, and so on. Except the curve points (have to figure out how to do that nicely), good news is that in Blender 2.69+ you can now copy/paste curves.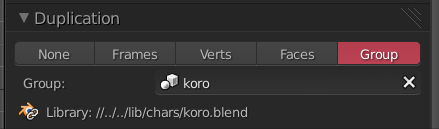
Dupli Groups UI: Library Path
When using a linked Dupli Group, display the library path below.Find it on the Duplication panel, Object properties.ProTip:
Clicking on the .blend library path (Blender icon) will open the file in a new Blender instance.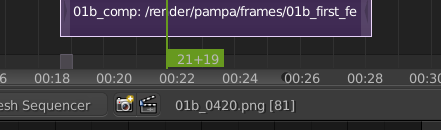
Sequencer: Display Image File Name
When seeking through an image sequence, display the active strips' file name for the current frame, and it's [playhead].
Find it on the VSE header.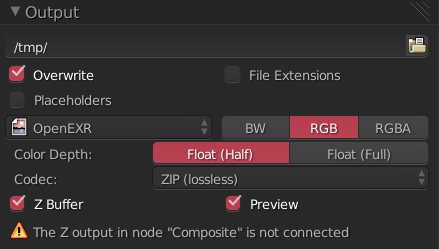
EXR Render: Warn when Z not connected
Display a little warning label when exporting EXR, with Z Buffer enabled, but forgot to plug the Z input in the Compositor.
Might be a bit too specific, but found it nice to remember to plug the Z input if we explicitely specify for Z Buffers to be saved (because it's disabled by default). Find it on the Output panel, Render properties.
Miscellaneous
-
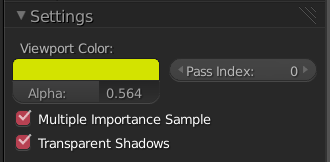
Cycles: Viewport Alpha for Materials
This would enable transparency for objects in the 3D View (solid), now it's built-in. Just enable Transparency on the Object properties (Display Panel). Then control it via the "Settings" panel on the Material properties.
Success! this is now in Blender 2.70!
No need to have it in Amaranth anymore. Gone!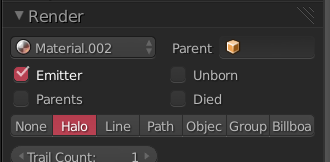
Material Indicator for Particles
Success! this is now in Blender 2.70!
This was added during Amaranth 0.6, no need to have it anymore. Gone!-
Shortcut: Shift + Z for Rendered view
Success! this is now in Blender 2.70!
Success Stories
This is the best part, when useful features in an addon make it to the official Blender. Forever for everyone to use.

Past Versions
It's always best to use the latest, but in the rare case you're using an older version of Blender, here are the past releases.
1.0.0 - Saez Release | Get this if you still use Blender 2.73
0.9 - Cuyo | Video | April 20th, 2014
0.8 - Pampa | Video | March 3rd, 2014
0.5 - Massive! | Video | August 14th, 2013
0.3 - Fix & More | May 20, 2013
0.2 - Initial Release | Video | May 14, 2013
I love Amaranth! Can I throw money at you?
Even better: you can join the Blender Cloud, enjoy all the tutorials and movie assets, and at the same time support Open Projects that make Blender better! Win-win isn't? . Additionally, you can also join the Development fund, an initiative that pays developers to work on making Blender stable by fixing bugs and implementing crucial features.
FAQ
- Your Blender is pink
Yep it is. And yours can be pink too! Grab the pinkified theme here. - How do you do this addon stuff?
Best way is to read from built-in templates in Blender text editor, or from other people's scripts and learn (then copypaste like a boss) - Can you make this awesome feature?
Probably not. I'm an artist. I know nothing about coding, just find myself needing a certain tool (or wasting too much time doing boring steps) and thinking ways in getting it done the fastest and cheapest possible. Just mess around with the code. - Do you plan to maintain this baby?
Well, I use it for my personal work so it will have new stuff coming. And if it stops working at some point, I'd be pissed off as well. So yes.